Vite를 사용하여 빌드할 거야!
이점 : 전체 모듈을 매번 번들링하는 것이 아니라 변경된 모듈만 교체하기 때문에 개발을 빠르게 진행할 수 있다.
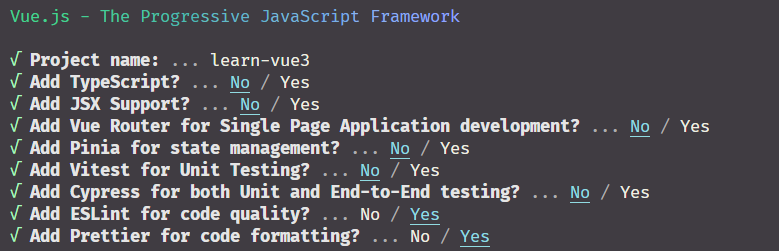
npm init vue

.. 여러 설정 yes/no로 넘어감
.. ESLint/Prettier 만 Yes

# 해당 디렉토리로 가서
npm i
ESLint, Prettier 설정
vite.config.ts
// https://vitejs.dev/config/
export default defineConfig({
  plugins: [vue()],
  resolve: {
    alias: {
      '@': fileURLToPath(new URL('./src', import.meta.url))
    }
  }
})
alias 설정 : 파일시스템 경로의 별칭을 설정할 때 사용
// main.js
import { createApp } from 'vue'
import App from './App.vue'

import './assets/main.css'

createApp(App).mount('#app')
createApp 을 app 이라는 아이디에 렌더링 해라
index.html 은 div 태그의 아이디가 app으로 되어있음.
ESLint 설정
코드 컨벤션은 굉장히 중요함.
style-guide 특정 패턴으로 개발하면 굉장히 유용하다.
/* eslint-env node */
require("@rushstack/eslint-patch/modern-module-resolution");

module.exports = {
  "root": true,
  "extends": [
    "plugin:vue/vue3-essential",
    "eslint:recommended",
    "@vue/eslint-config-prettier"
  ]
}
- 컴포넌트 이름을 사용할 땐 합성어로 사용하라.
- props를 설정할 때도 배열로 하기보다 객체로 만드는것이 상세하다.
"eslint:recommended",
ESLint의 추천 항목을 자동으로 검사해라.
"@vue/eslint-config-prettier",
충돌 방지 옵션임.
ESLint Rules 관련 정보 https://eslint.org/docs/latest/rules/
다양한 규칙이 있음.
  rules: {
    "no-console": process.env.NODE_ENV === "production" ? "error" : "off",
  },
위와 같이 만들 수 있는데 error 말고도
- warn (경고창만 띄움)
- off (사용 안함)
을 사용할 수 있다.
rules: {
    "no-console": process.env.NODE_ENV === "production" ? "error" : "off",
    "prettier/prettier" : ["error", {
      프리티어 룰들 적용
    }]
//settins.json
  "eslint.validate": [
    "javascript",
    "typescript",
    "vue",
    "html",
    "markdown"
  ],
  "editor.codeActionsOnSave": {
    singleQuote: true,
    semi: true,
    useTabs: true,
    tabWidth: 2,
    trailingComma: 'all',
    printWidth: 80,
    bracketSpacing: true,
    arrowParens: 'avoid',
  },
이런식으로 하면 eslint 활성화 되는 언어 지정 가능 그리고 vscode를 저장할 때 eslint를 적용해라라는 옵션임.
반드시 format on save 옵션은 해제해줘야 함 (prettier 플러그인이 있다면 끄는것이 좋을 수 있음)
이렇게만 하면 사용할 수 있음!
npm run lint를 통해 전체 파일에 lint 진행을 할 수 있다.